

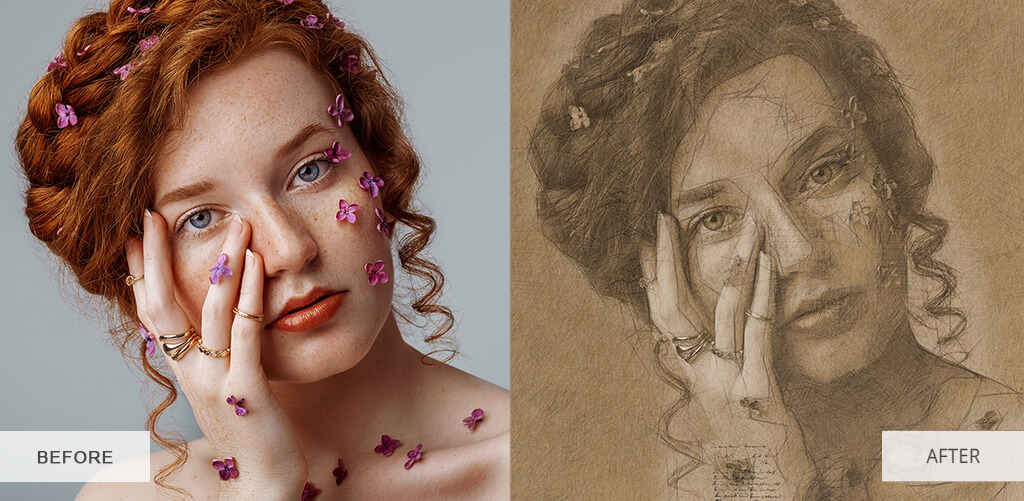
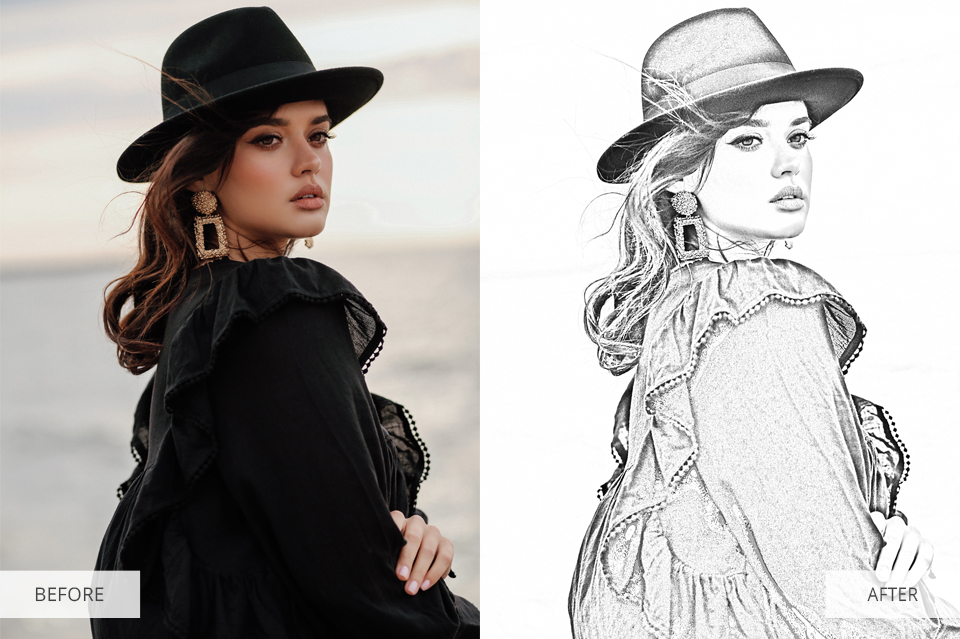
How To Turn Photo into Sketch in Photoshop

In this tutorial, we’ll walk you through 2 methods of how to turn photo into sketch in Photoshop step by step. The first method of creating a pencil sketch is simpler, suitable for beginners who want to save time. It is about using Photoshop actions that will do everything automatically. The second method is to use Photoshop tools. In this case, you will be able to control the process. The finished result will depend on your actions but it requires more time and skills of working with the software.
Turn Photo into Sketch in Photoshop Using Actions
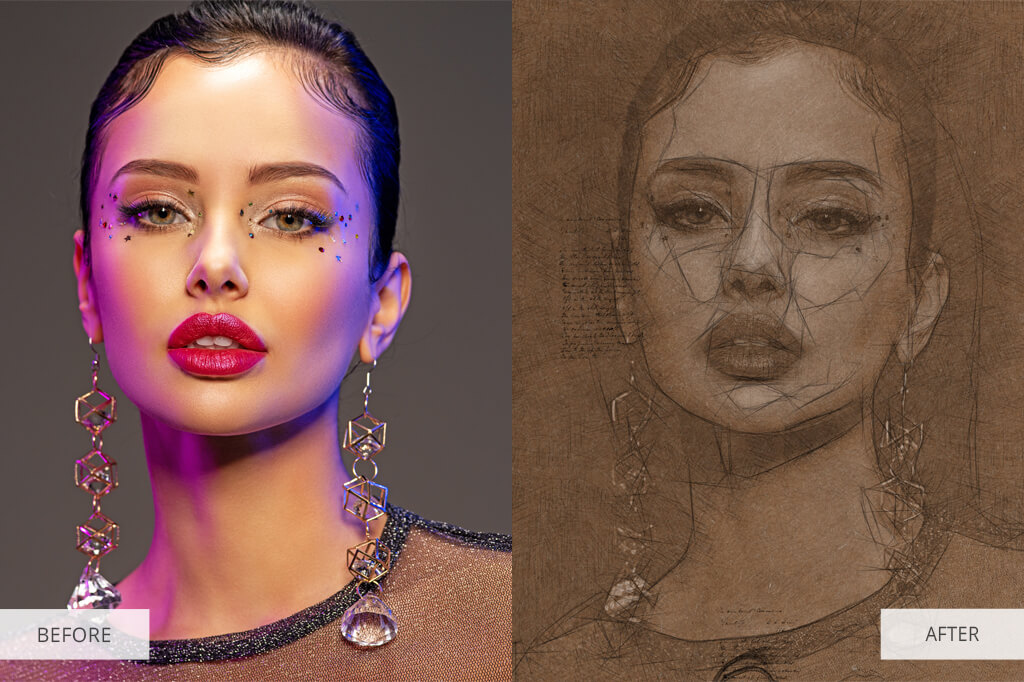
Using Photoshop actions, you can easily turn any photo into a professional pencil sketch in just a few seconds. Some actions create a black and white drawing while others allow you to colorize the finished work. At the same time, they can be applied to different types of photographs, not only to portraits.
The tools will automatically apply all the necessary adjustments. All you need to do is download the Sketch Photoshop Actions Bundle and install them in the program. After that, you will get a set of settings, brushes, and patterns.
Furthermore, the tools work with JPG and RAW files, can be installed in all versions of Ps, starting with CS3.
Step 1. Add Actions in Photoshop
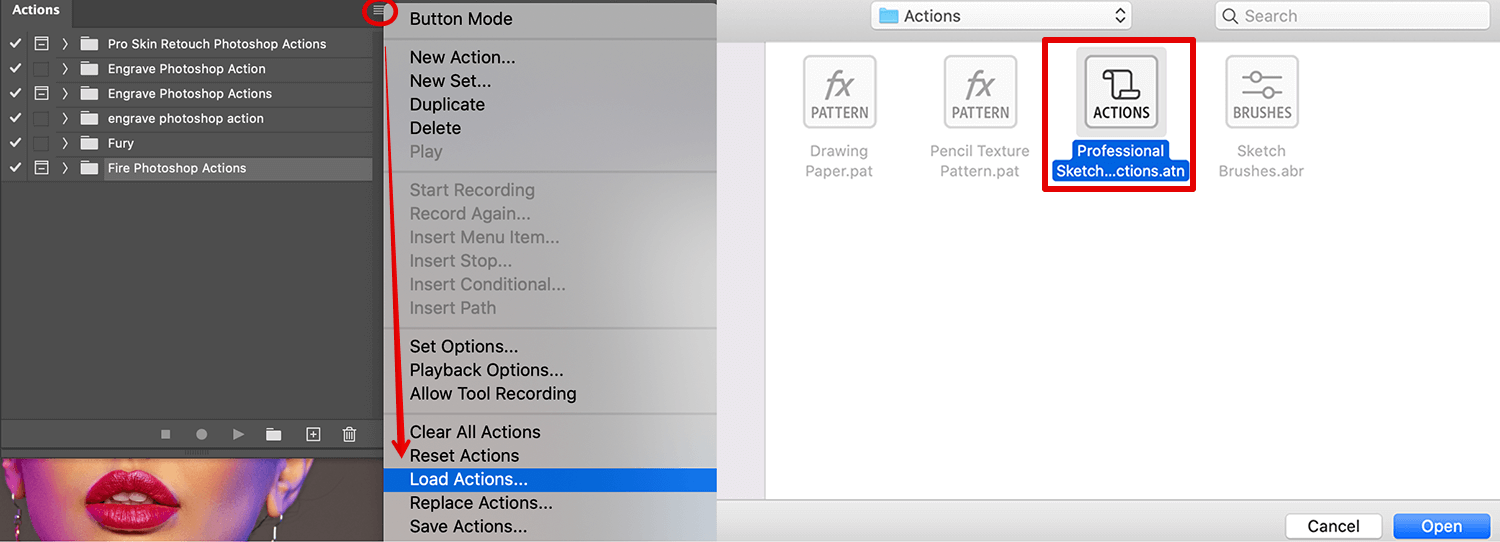
First, launch the download and note down which folder the ATN file was saved to. In the software, find the Actions panel. If it is not immediately visible in your workplace, go to the top Window tab and you will find it in the drop-down list. Alternatively, press the Alt+F9 key combination.
In the upper right corner of the separate Actions window that just appeared, find the tiny button marked with an inverted triangle next to three horizontal lines. The drop-down menu is where you can load new actions. Recollect where that ATN file is stored and open it to start the upload.
Step 2. Add Patterns in Photoshop
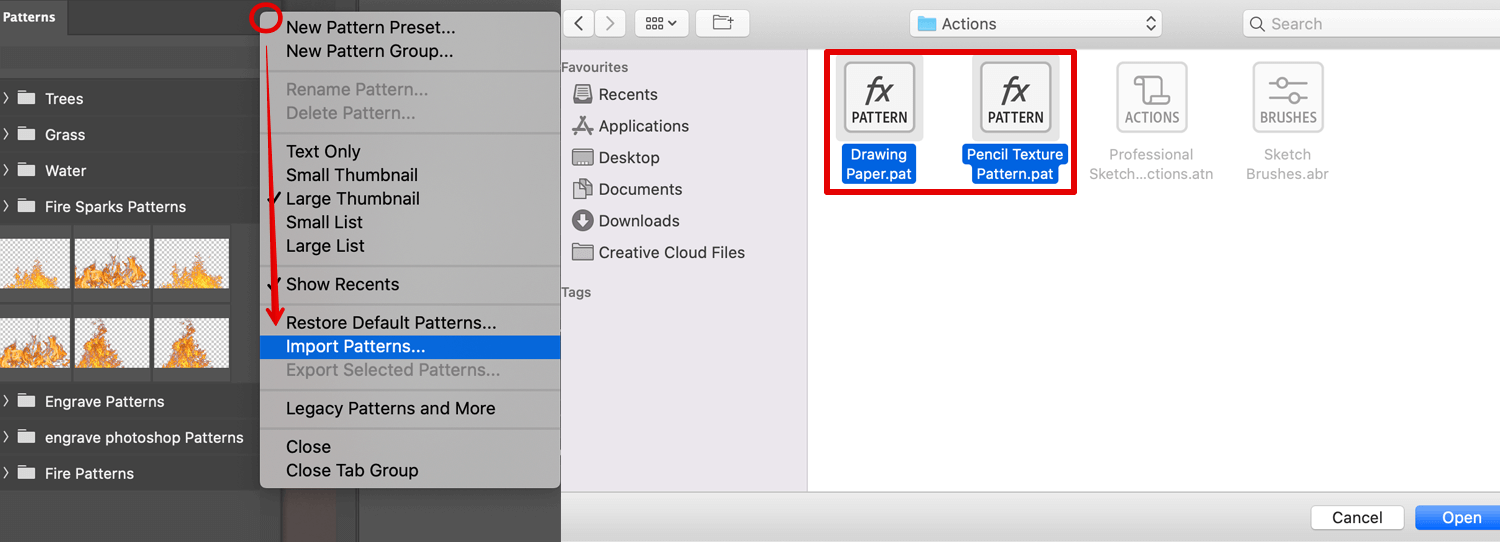
Add patterns to Photoshop if needed. To do this, select Edit – Presets – Preset Manager. In the last section, select Preset Type – Patterns and click the Load button.
Step 3. Import Brushes
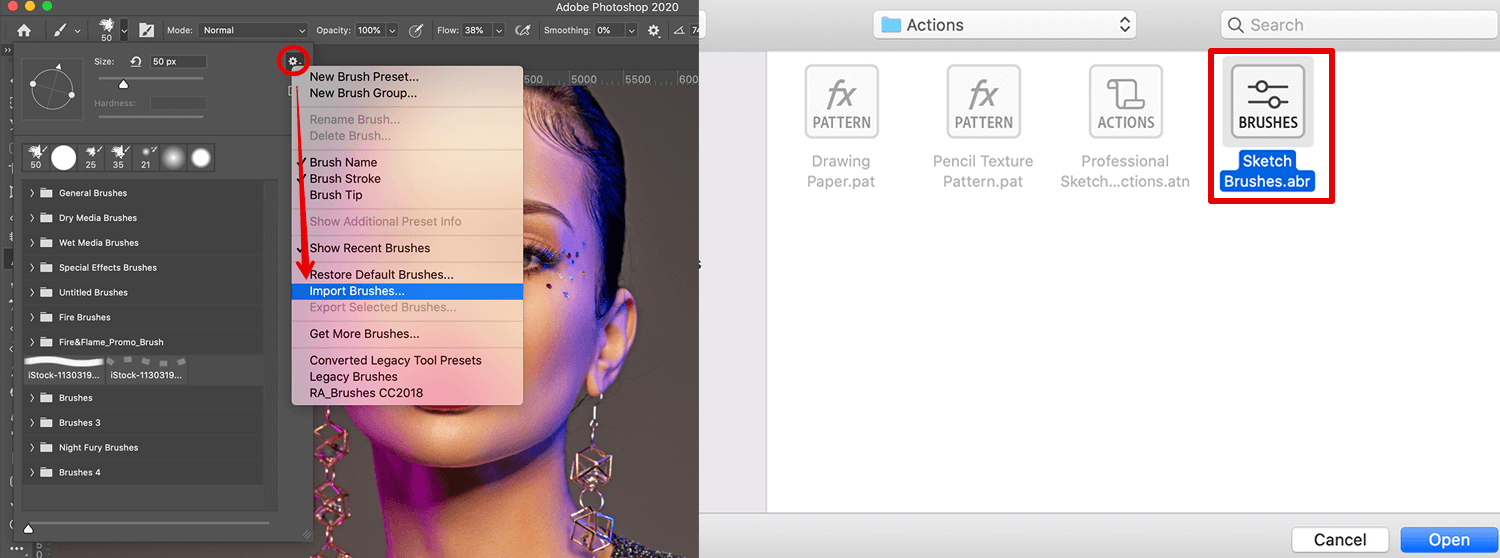
To add new brushes, first select this tool as a working tool. After that click on the triangle near to the active brush image. After that, you need to select the import brushes item and specify the path to the files.
Step 4. Apply Actions to the Photo
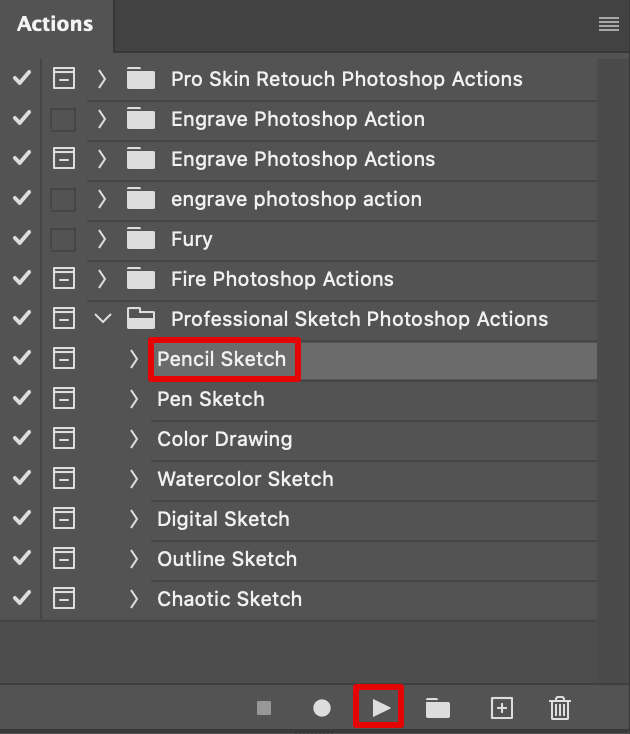
Proceed with opening an image you were planning to alter and applying the newly added action to it. The latter action will be performed after you click on the special button at the bottom of the same window that’s shaped like a triangle on aside.
Step 5. Adjust the Received Effect
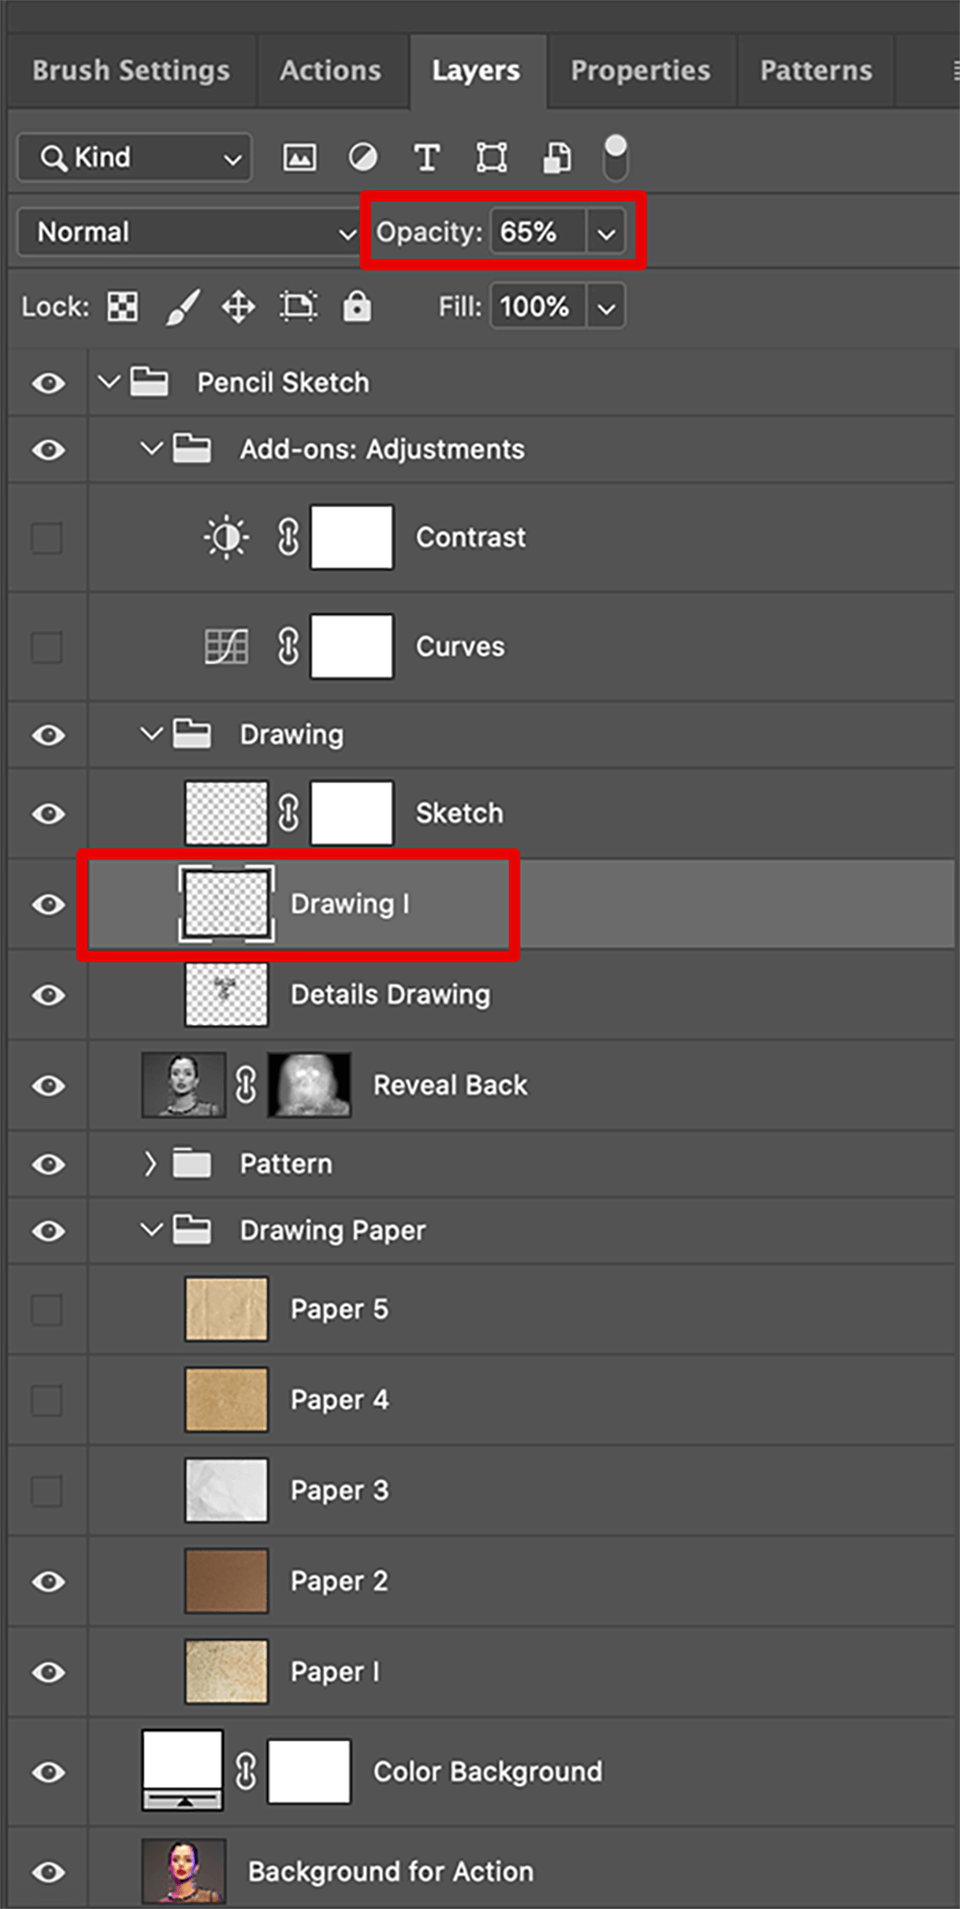
The intensity of the effect is standardized but you can make alterations. Those can either be applied to the entire group of layers compiling that action or to the specific ones within it. If you want to work with the group, activate it by clicking the folder button it’s marked with. After that action, you can work on the proper levels of effect intensity and overall layer opacity.
Turn Photo into Sketch in Photoshop – Next Method
The next method will take more time. However, you will have absolute control over each step with the ability to adjust the necessary parameters as you’re setting them. This method allows you to have the fine pencil strokes defining the shapes as well as some smoother shading that is characteristic of a pencil drawing. In case you do not have Photoshop on your PC, we advise you to use the free online sketching photo editor which supports all the following steps of the tutorial.
Step 1. Open a Photo and Create a Duplicate
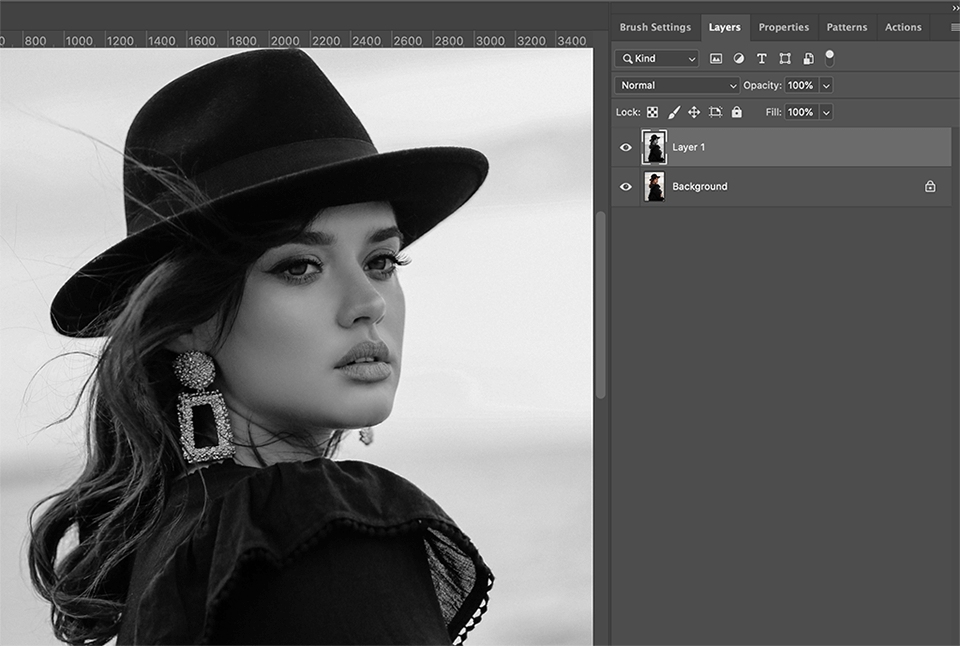
Launch the program and open the necessary image in the workplace. You will find the “Open…” command in the “File” tab. Start with creating a duplicate layer using the Ctrl/Cmd+J key combination.
Step 2. Create a Black & White Layer
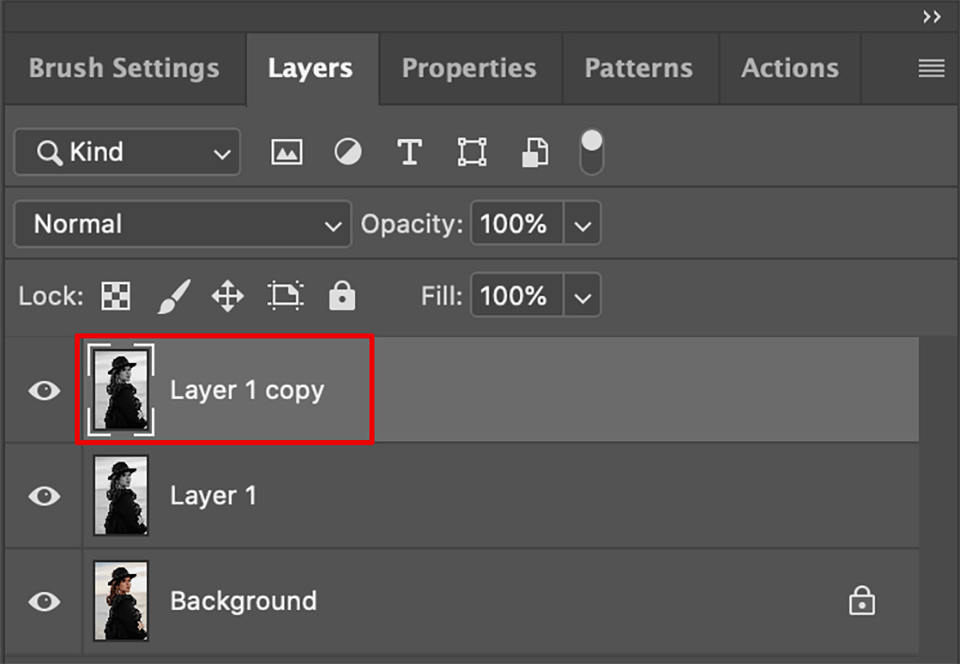
That new layer should now be turned monochrome. To do this, use the Ctl/Cmd+Shift+U command. After that repeat the duplicating step from above for this new layer.
Step 3. Apply Inverting
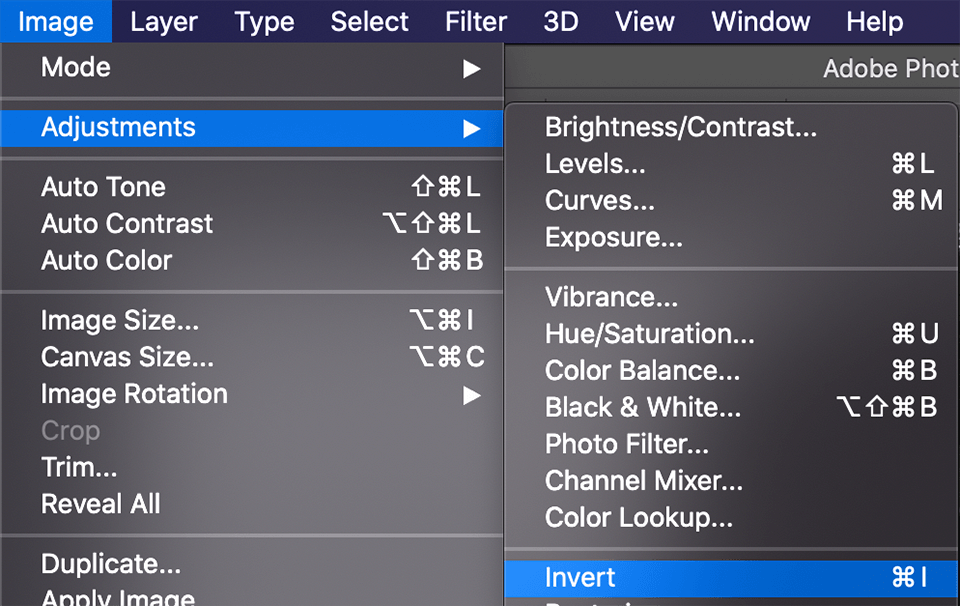
For the top B&W layer, you should apply inversion by calling this action in the Adjustments section of the Image tab. It can be activated faster with the Ctrl/Cmd+I keyboard shortcut.
Step 4. Change the Blending Mode
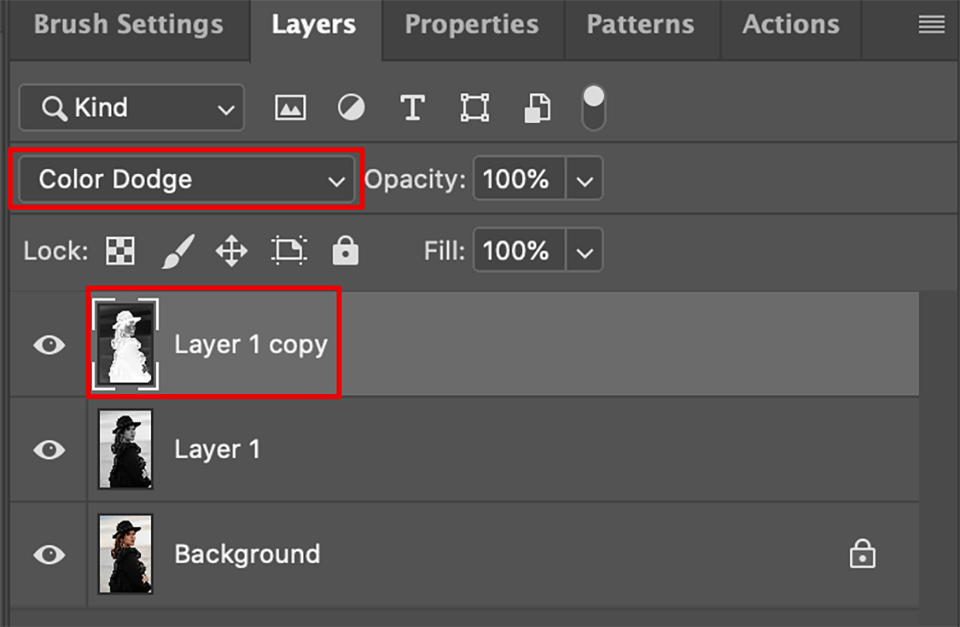
We advise Color Dodge which is hidden under the default Normal mode, still in the window for layers. The list can be expanded by simply clicking on that name. This will turn everything white but that is the correct part of the process.
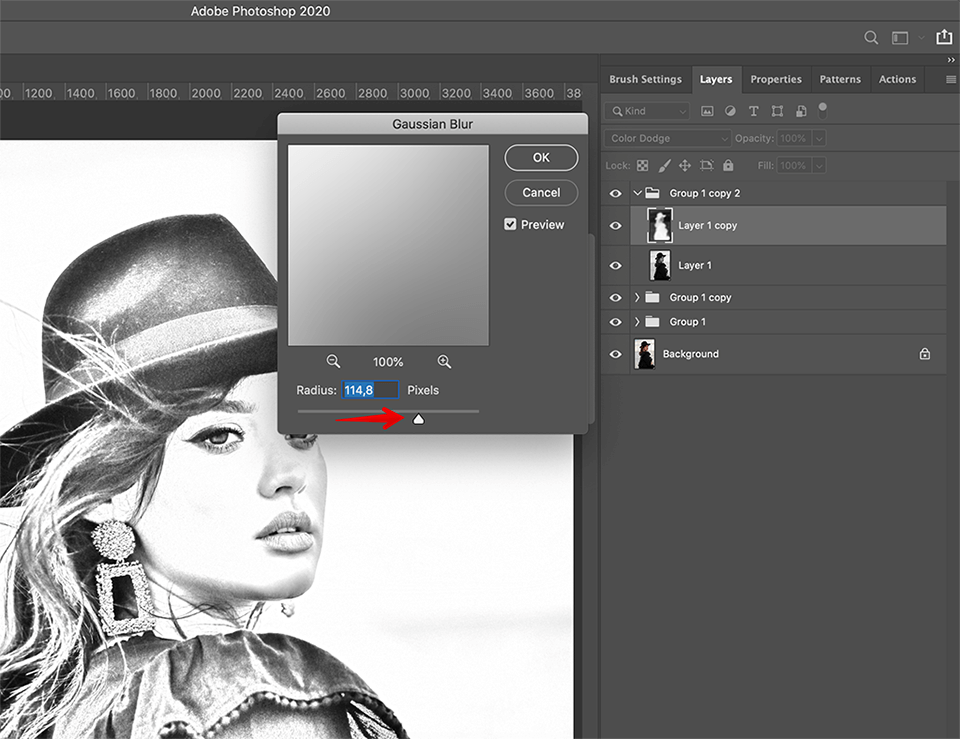
Step 5. Use Blur
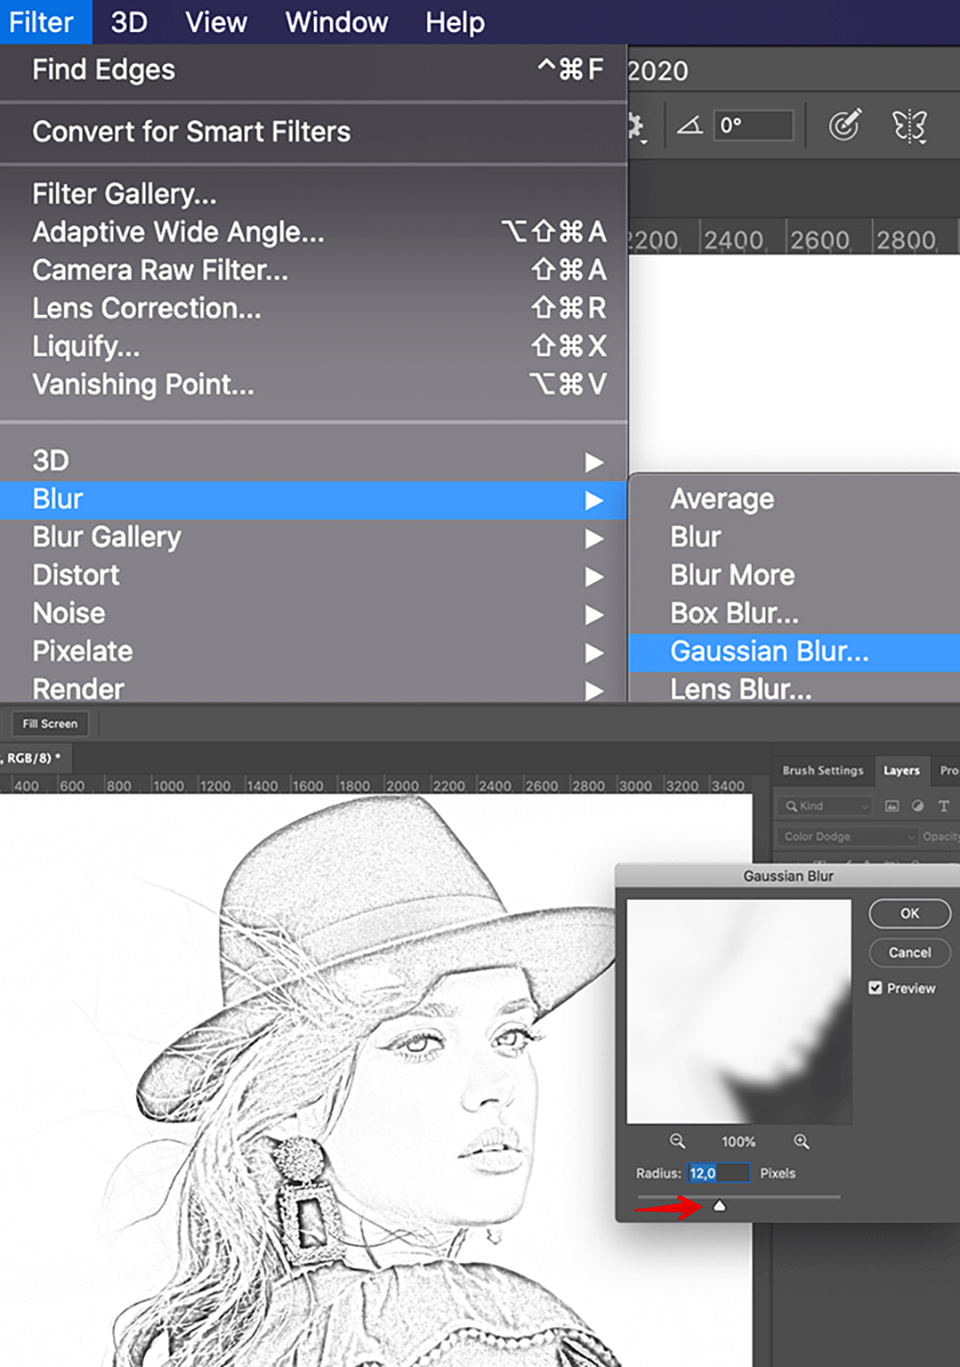
Going back to the top tabs, select the Blur line of the Filter tab and click on the Gaussian mode there. Wiggle the slider around to find where you start getting those nice thin outlines. That is the main part done.
Step 6. Add Pencil Strokes
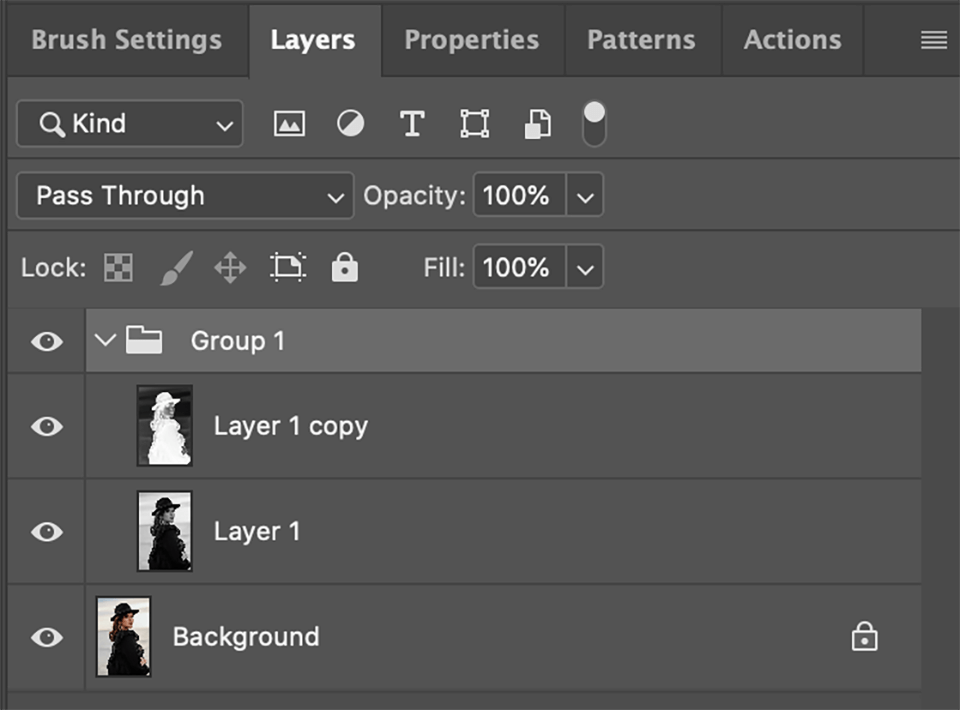
After providing you with an outline, many tutorials explaining the ways to convert photo to sketch in Photoshop stop. However, if you want to have that shading which is particular of pencil drawing techniques, group those monochrome layers by pressing Ctrl/Cmd+G while they are all selected. After that, duplicate the resulting group using the command you already know.
Step 7. Apply Blurring
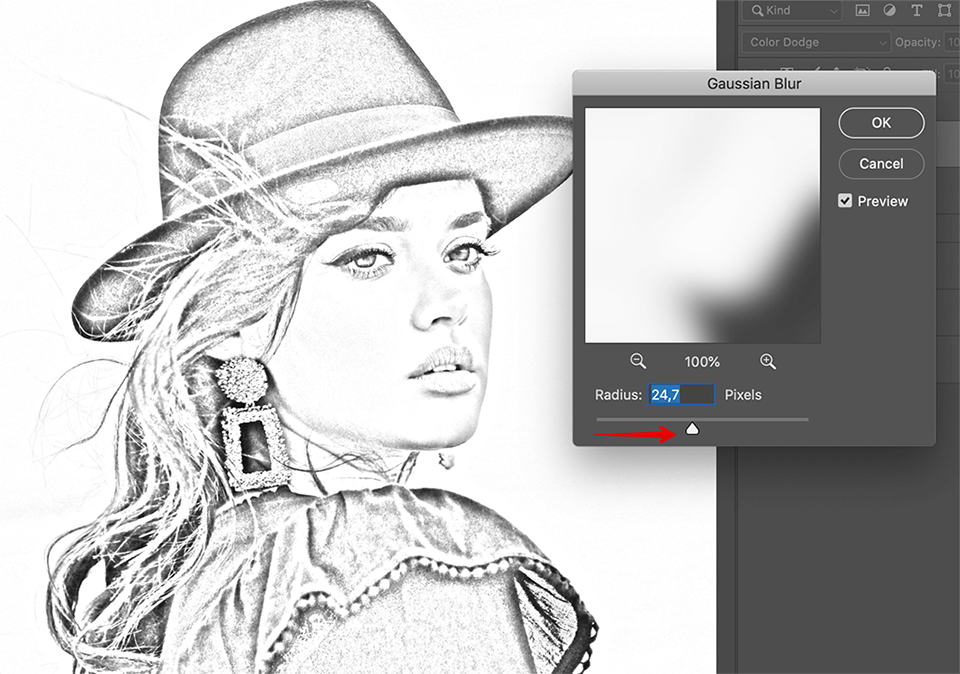
Apply the Gaussian Blur to the primary layer in our freshly made group similar to the way you did it earlier. The shading can be softened or made more intense.
Step 8. Blend Layers in the Group
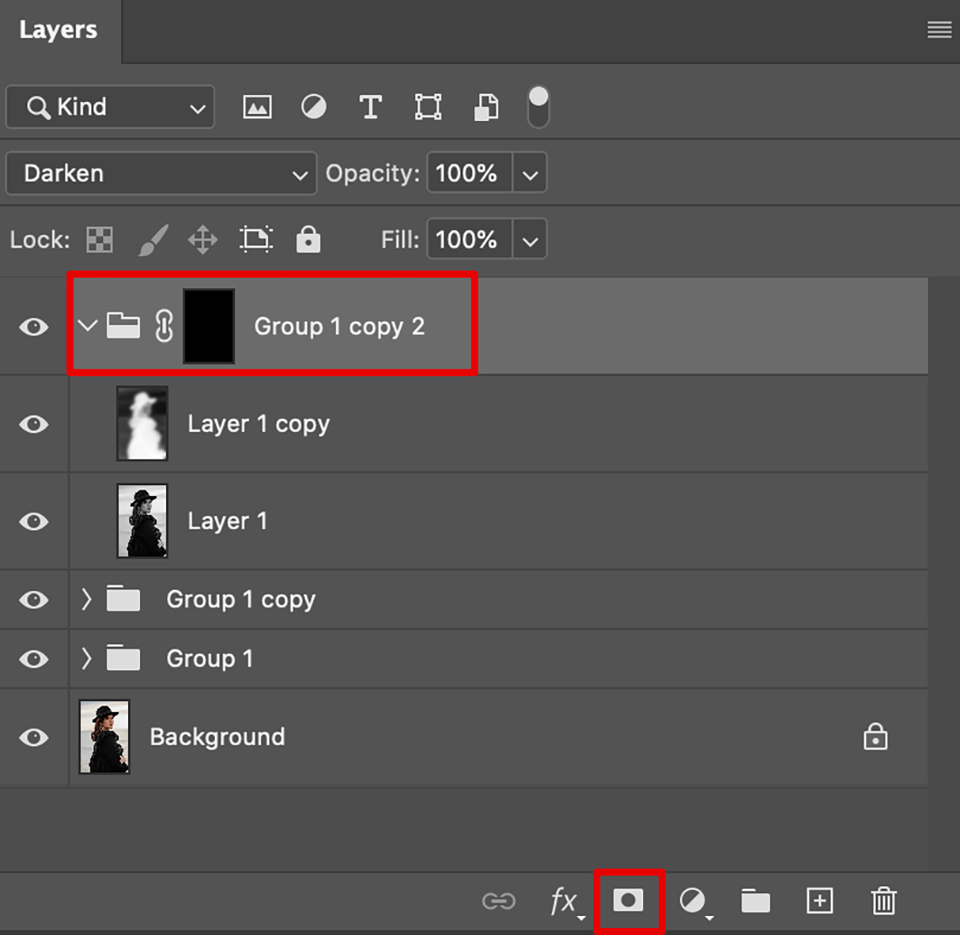
Working with the whole group, pick the Darken mode to blend the layers. After that, move the opacity slider to get a good effect and make one more duplicate of the group. Now, activate the top layer in our copy, and cast Gaussian Blur over it again. Keep pulling the slider until the final shading becomes satisfactory.
Step 9. Masking the Effect
Add a black mask by holding the Alt/Option key while you’re clicking on the dedicated mask layer button.
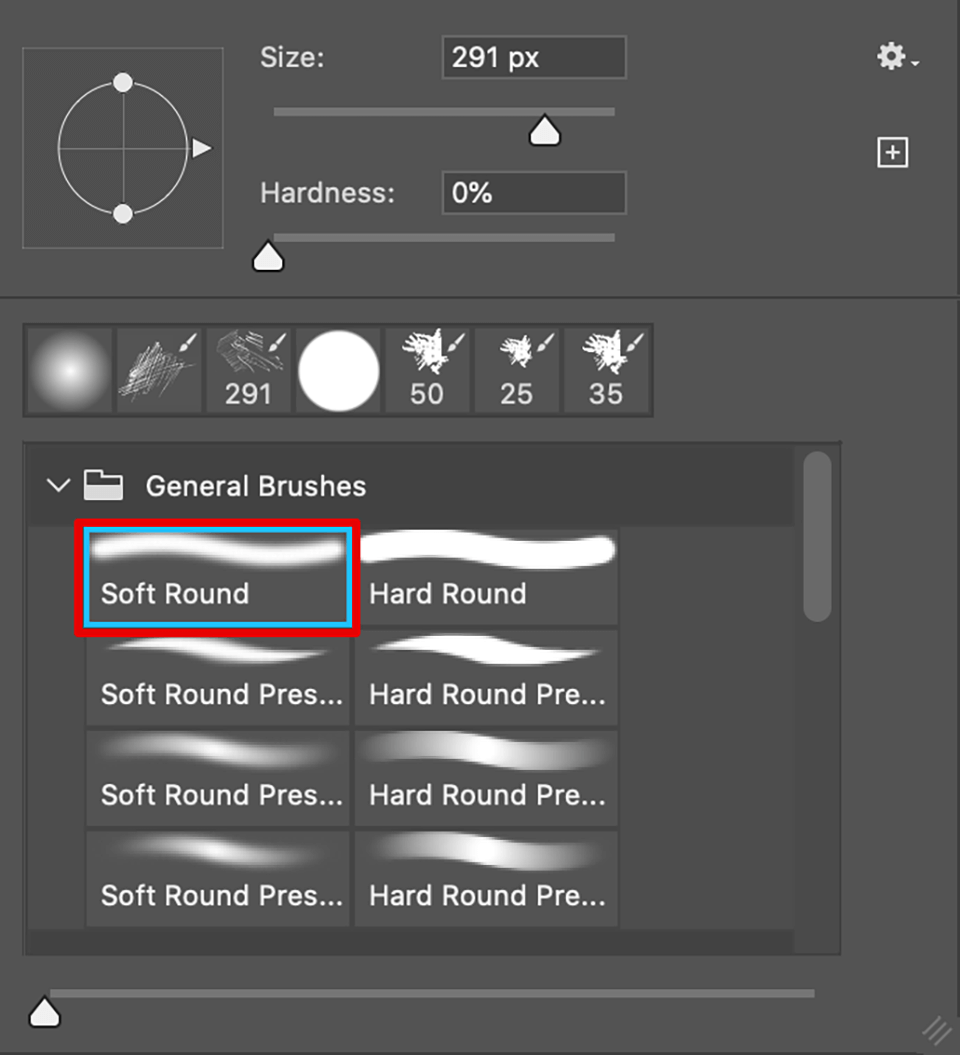
Now get a brush by pressing the B key, make its edges soft and make sure to paint with pure white but only at 30% of the opacity. Now you can indulge in a fun process of personally adding the shading where the program didn’t.
Step 10. Sharpen the Pencil Strokes
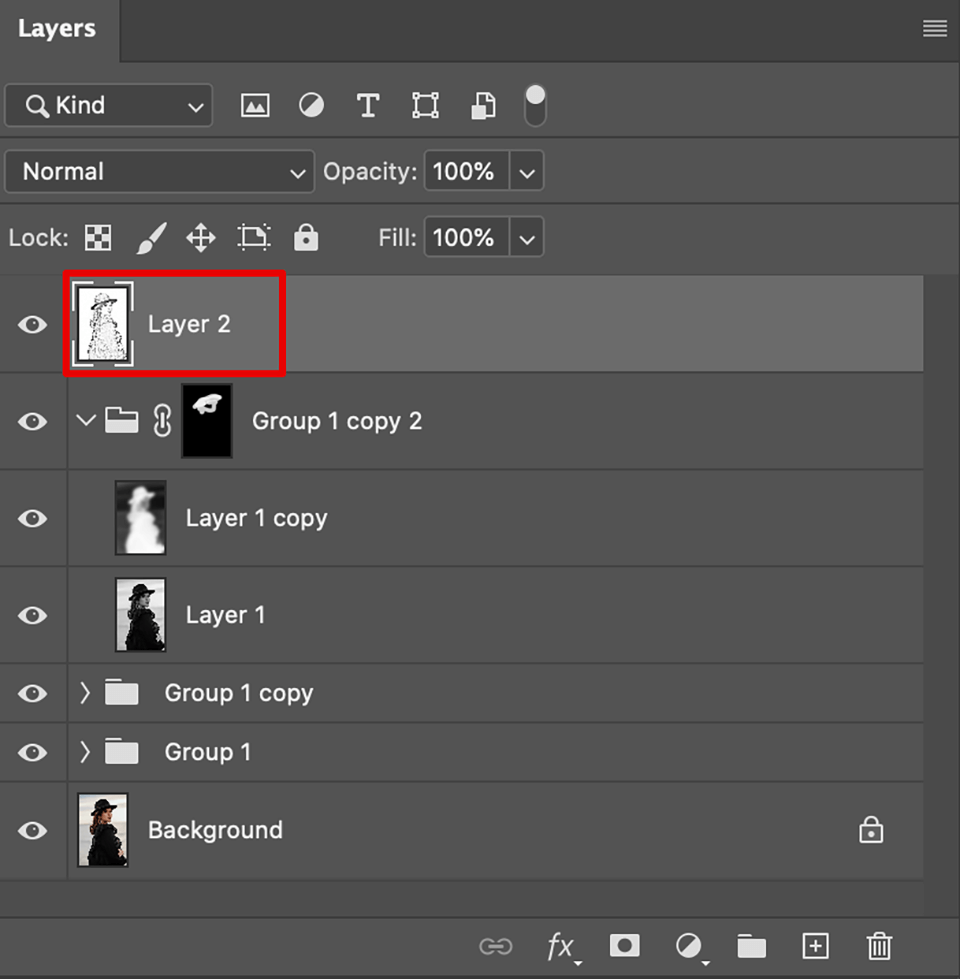
This step requires a composite layer that can be generated by pressing Ctrl+Alt+Shift+E (Windows) Cmd+Option+Shift+E (Mac) while the top layer selected.
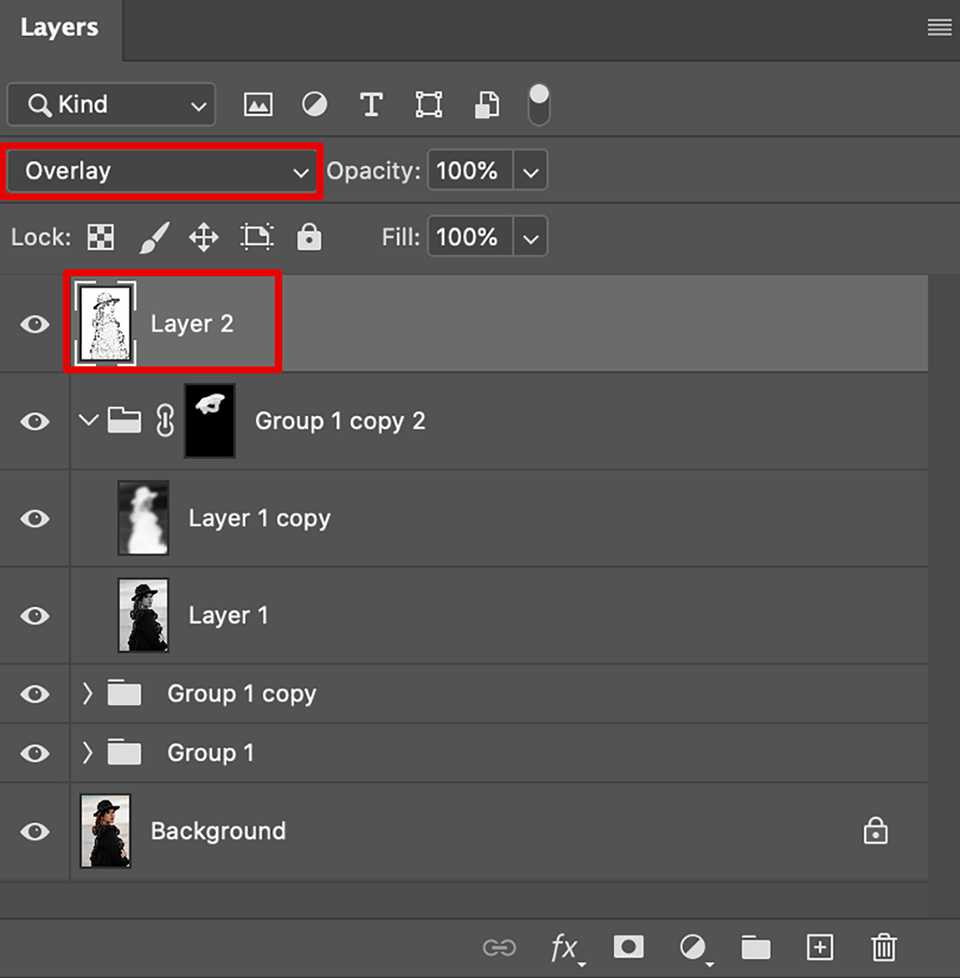
You should blend it with the rest using the Overlay mode.
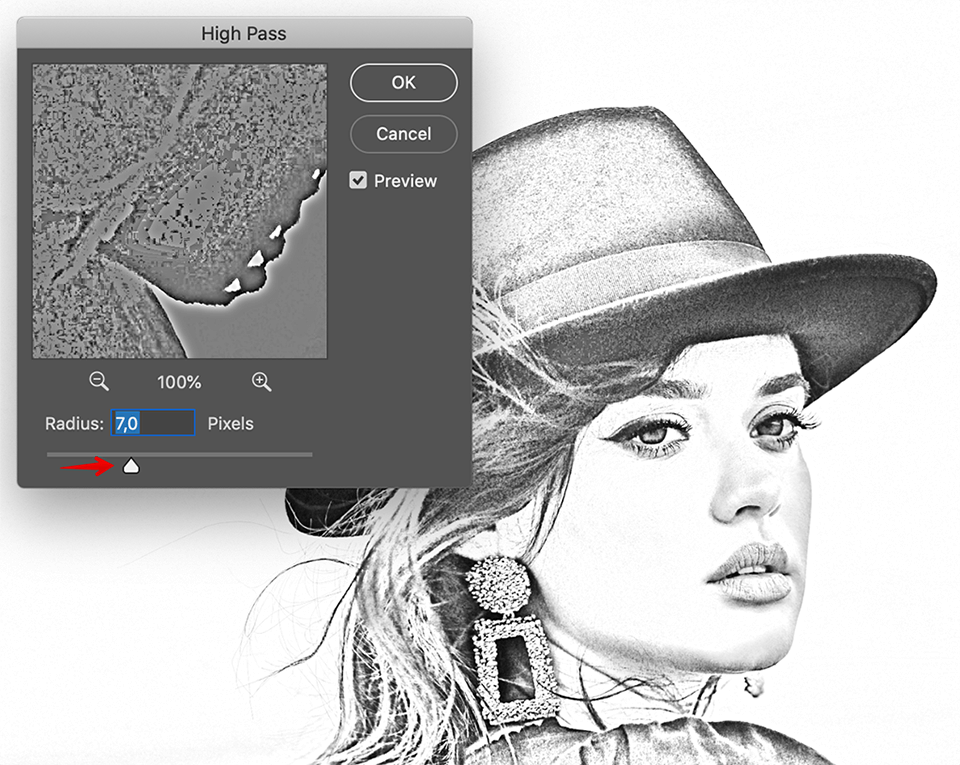
Go to the Filter tab and within the Other sub-item find High Pass. Don’t hesitate to tweak it to obtain the most appealing effect.