Although WordPress is a feature-rich content management system with plenty of WordPress themes, it doesn’t come with document management capabilities out of the box. If you want to upload documents to your website and allow users to download them directly, you’ll need either a custom solution or a few good WordPress document management plugins.

WordPress document management plugins allow users to keep their documents and files organized, create a document database, share resources with team members, and much more. They’re great for any business that needs an easy way to keep track of their documents – whether they’re a small or medium sized business, an enterprise, or a remote working environment.
In this article, we’ll cover everything you need to know about WordPress document management plugins – why you need them, what features to look for, and what you can do with them. We’ll also step through a quick tutorial. It will show you how you can create your own fully-functional, front-end WordPress document library.
Let’s get started!
Why You Need WordPress Document Management Plugins

WordPress document management plugins are great for businesses that need to keep track of documents or allow users to download files directly from their website. In addition to this, here are a few more reasons why your business might need a solid document management solution:
- Document sharing platform. You can use a WordPress file manager to create a document sharing platform to make documents and files available to employees in your organization. This way, employees wouldn’t have to send emails back and forth requesting access to a particular document.
- Organizing files. If you work with a lot of documents, having a WordPress document management system built into your website will help you keep things organized. You’ll be able to sort your documents and files by categories, tags, and/or custom taxonomies.
- Searchable and sortable table layout. Organizations (such as laboratories, legal firms, or finance businesses) that store a large number of documents often need a simple way to find documents. Having a WordPress library plugin that displays documents in a searchable, sortable, and filterable table layout makes this possible.
- WordPress resource library. If you want to share resources with your users, then a document manager plugin is the perfect way to do so. In the old days of the web, ‘Links’ pages were popular. Since then, people have realized that lists of links are not user-friendly or good for SEO. As result, they’ve been replaced with WordPress resource libraries containing interactive lists of documents and other resources. There is also a WordPress SEO guide with the bunch of useful tips to help you improve SEO ranking.
As you can see, there are countless ways to use WordPress document management plugins to better manage your organization’s documents and files directly through your website.
How Organizations Benefit from Document Management Systems
Traditionally, organizations store their documents on shared network folders making it easy for everyone in the organization to access them. The problem with a shared network folder system is that documents get lost all the time due to poor organization and folder structures.
One way to overcome this is by putting together a document management system that allows users to store and track their documents and files from a central location. By doing so, you can effectively maximize productivity and save time finding documents.

Organizations use document management systems on their websites so they’re able to access important documents and files quickly and share them with their team members over private staff intranets. There are a number of ways organizations can benefit from document management systems:
- Improves accessibility. If your company has offices in different locations or hires remote employees, you’re going to need an easy way to make important documents and files available and accessible to your employees. Making documents available through your website makes it easy for employees to view or download the file regardless of where they are.
- Increases productivity. Managing documents manually is pretty time-consuming. With a document management system, you can reduce the time spent uploading, tracking, and sharing documents and files.
- Document security. Having all of your documents in a central location makes it significantly easier to keep them secure as opposed to having them scattered in multiple locations.
Aside from a considerable productivity boost, having a document management system hosted on your WordPress website will improve accessibility and make it easier for you to keep your files safe and secure.
What to Look for in a WordPress Document Management Plugin?
Regardless of what you intend on using a WordPress file manager for, here are some essential features you should be on the lookout for:
- Supports various file formats. When you’re looking for WordPress document management plugins, it’s important to go with one that supports several different file formats (such as docx, xlxs, pptx, rtf, tiff, pdf, etc.). This way, you’ll be able to upload all of your documents and files without having to worry about ending up with a file type not supported error when you need the document.
- File size capping. If you’d like to allow your employees, team members, or site users to be able to upload documents to your WordPress document library, you’ll need a way to make sure they don’t upload large files. Use a WordPress library plugin that lets you limit the maximum file size based on your site’s storage capacity.
- Documents download history. Often organizations set up a WordPress file hosting system on their website to allow employees and/or users to download files. It’s a good idea to keep a record of the documents downloaded the most and when they were downloaded.
By now, you should have a clear idea of how your organization can benefit from a powerful document management system. The only problem is that there aren’t a lot of good WordPress document management plugins out there. That said, you can achieve the functionality you’re looking for simply by using two WordPress file sharing plugins in tandem – WordPress Download Manager and Posts Table Pro.
How to Create a WordPress Document Library for Docs and PDFs
With the right combination of WordPress document management plugins, you can create a powerful document repository on your WordPress website that allows users to search, sort, and filter your documents and files for easy, quick access.
In this step by step tutorial, we’ll start by showing you how you can use the WordPress Download Manager plugin to add documents to your website as custom post types. This plugin also lets you sort your documents into categories and tags for good back-end organization.
Next, we’ll install the Posts Table Pro plugin to display the document library on the front-end. The plugin dynamically generates a searchable, sortable, and filterable table layout that provides a direct download link for each document or file.
Finally, we’ll show you how you can keep track of how many people have downloaded documents from your document library and which documents they downloaded.
Step 1: Install and Activate WordPress Download Manager Plugin
Log in to your WordPress admin panel and head over to WordPress document management plugins > ‘Add New’ from the dashboard. Search for the WordPress Download Manager plugin and click the ‘Install Now’ button once it shows up.
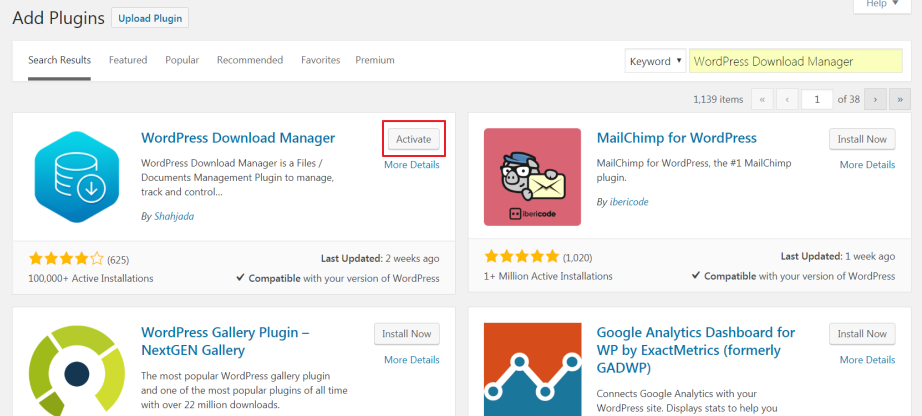
Once it’s installed, click ‘Activate’ to begin using it on your website.
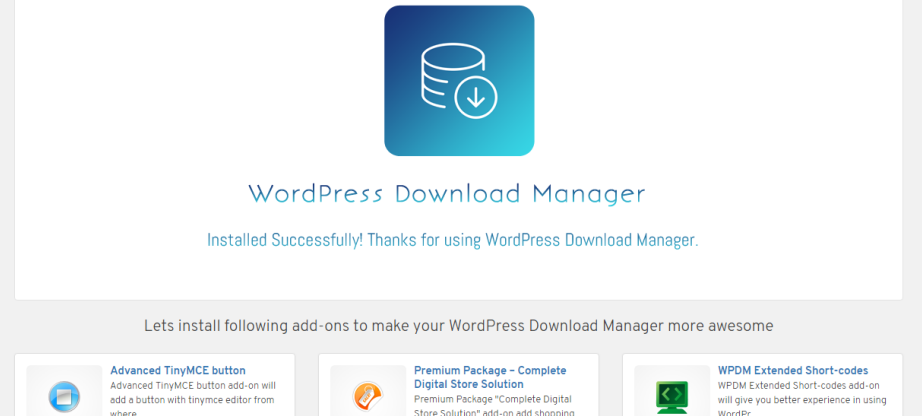
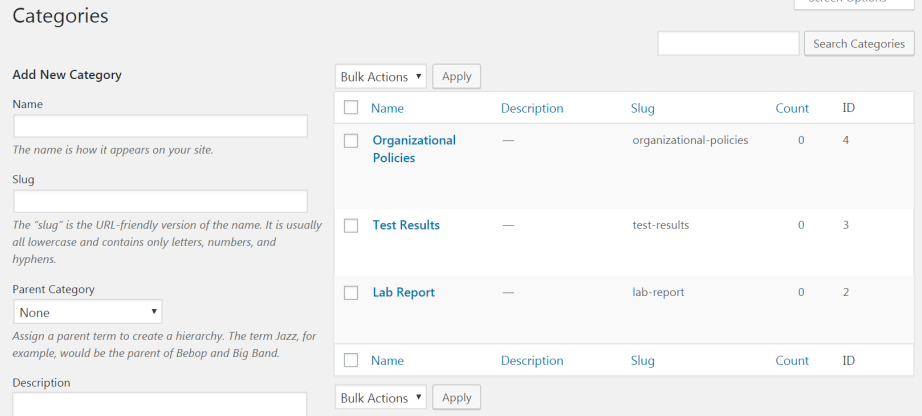
Go to ‘Downloads > Categories’ to add categories you’d like to sort your documents and files into.
Go to ‘Downloads > Tags’ to create tags for your documents and files.
By now, if we are talking about WordPress document management plugins, you should have the WordPress Download Manager plugin installed and activated to your website. You should also have some categories and tags to keep your documents organized. This will also help you find specific documents (or types of documents) faster once the document repository is set up. You’ll also want to make sure your WordPress site loads fast in general because there is a chance you need WordPress speed page optimization.
Step 2: Upload Documents and Files to Your WordPress Website
Navigate to ‘Downloads > Add New’ to add documents and files to your WordPress website.
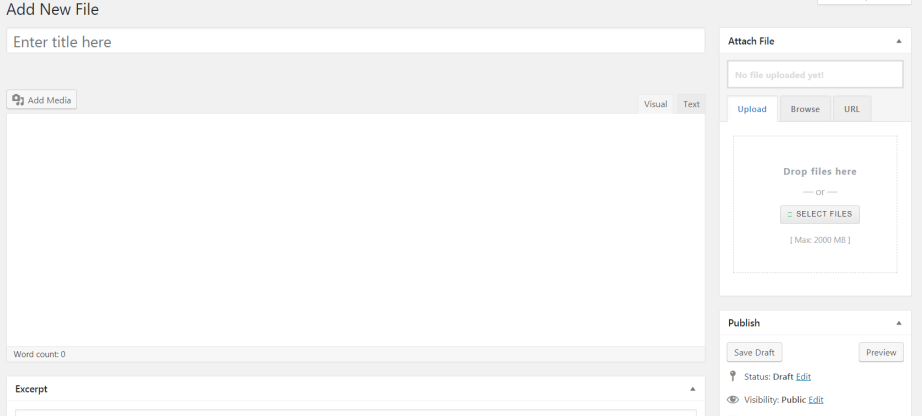
- Enter a document title. This is the title that’ll show up on the front-end.
- Use the ‘Attach File’ widget in the right sidebar to add your document. You can choose to: upload it from your drive, select it from your WordPress directory, and add a URL if it’s hosted somewhere else on the internet.
- Add a short description of the document in the ‘Excerpt’ box if you’d like to display that on the front-end.
- Select appropriate categories and tags for the document.
- Add a featured image for the document.
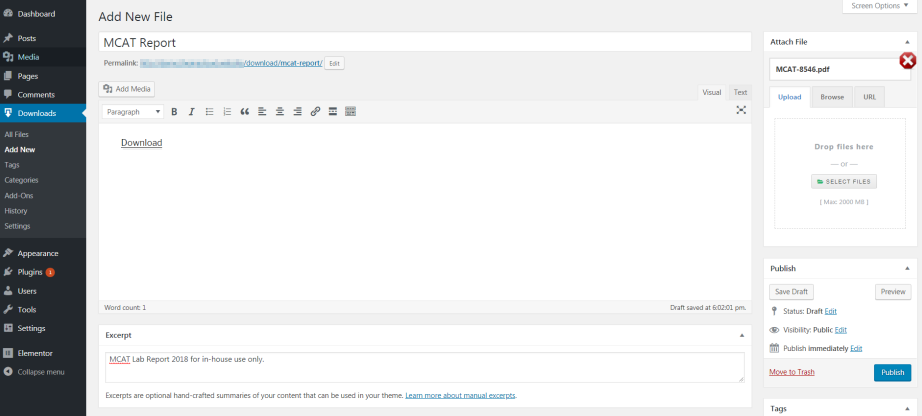
Optionally, type ‘Download’ in the text editor and link it to the URL http://www.your-site.com/?wpdmdl=123. Replace your-site.com with your site’s URL. Replace 123 with your document’s ID. You can get the ID from the document’s Add/Edit Download URL.
Click the ‘Publish’ button once you’re done.
Follow the steps outlined above. Add all of your documents and files to your WordPress website.
Step 3: Install, Activate, and Configure Posts Table Pro Plugin
Next, we’ll install the Posts Table Pro plugin to our website and configure its settings.
To do this, you’ll first need to purchase the Posts Table Pro out of WordPress document management plugins. Once you have the plugin’s .zip file, follow the steps outlined below to install and activate it to your website.
- Head over to ‘Plugins > Add New’ from the WordPress admin panel.
- Click the ‘Upload Plugin’ button from the top left-hand side of the screen.
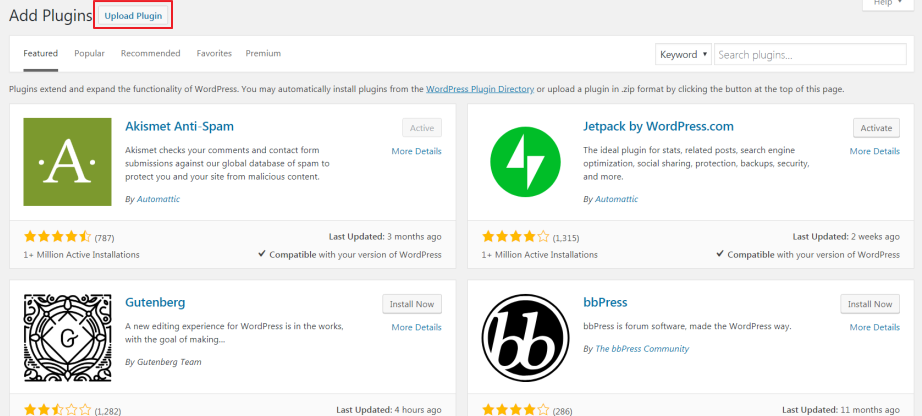
- Next, click the ‘Choose File’ button and upload the Posts Table Pro plugin’s .zip file to your website.
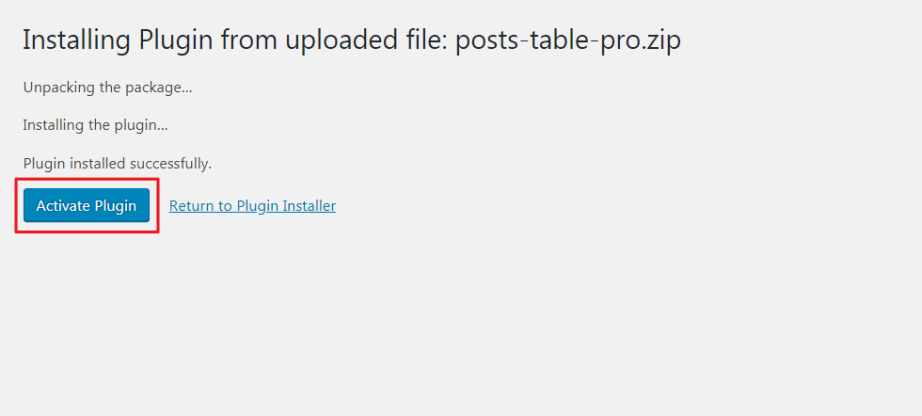
- Once that’s done, click the ‘Install Now’ button to begin installing the Posts Table Pro plugin to your website.
- Once it’s done installing, click the blue ‘Activate’.
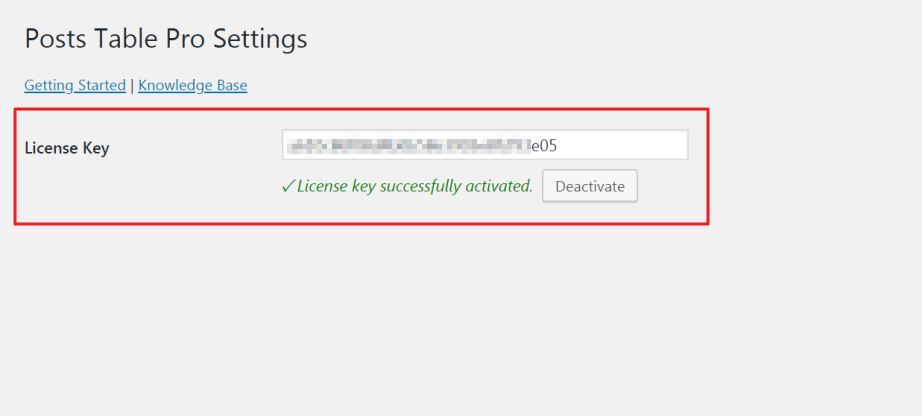
Configure the Posts Table Pro Plugin’s Settings
While we’re still on the settings page, we’ll configure the Posts Table Pro plugin’s settings to make the document library’s front-end table layout intuitive and user-friendly. Here’s what you need to do.
Under ‘Posts selection’:
Set the Post type dropdown to wpdmpro since we’re using the WordPress Download Manager plugin.
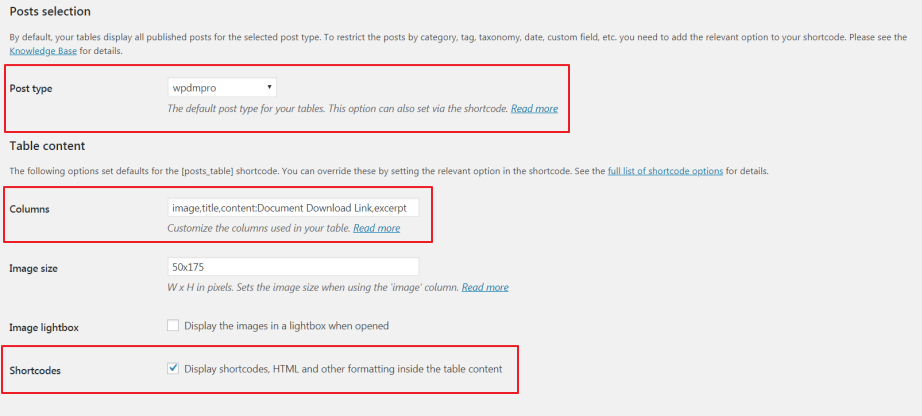
- In the Columns option, enter image, title, content: Document Download Link, excerpt.
- Tick the checkbox next to the ‘Shortcodes’. This will display clickable download links in the ‘Document Download Link’ section so users can download documents directly from the document library without having to go to a different page first.
Note: You can choose to display (or hide) columns based on your specific needs and preferences. For instance, if you wanted to display the author name, you would simply add the author to the comma-separated list of values for the Columns option. Here’s a complete list of available table columns parameters to choose from.
Under ‘Table controls’:
- Set Search filters to ‘Custom’.
- Enter tax: wpdmcategory, tags in the Custom filters.
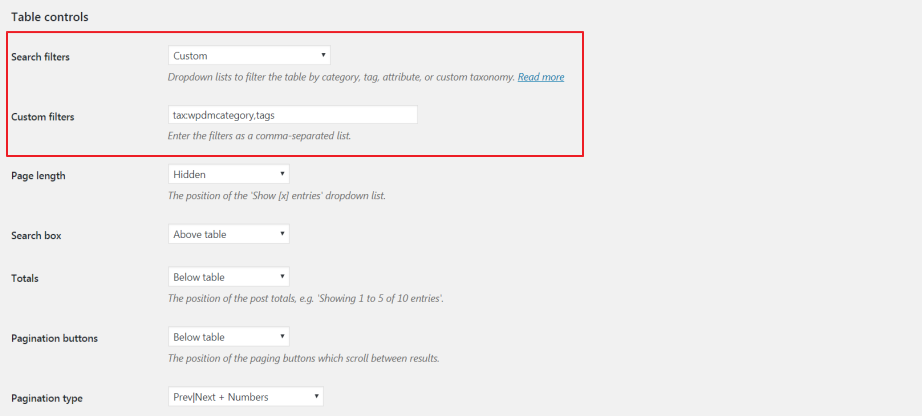
Note: Users will be able to filter the document library (without a page refresh) based on the same categories and tags we created in Step 1. Since we created the categories and tags for the Downloads custom post type, we’ve set the Search filters option to Custom.
Click the ‘Save Changes’ button to proceed.
Step 4: Create a WordPress Document Library for Docs and PDFs
By now we have both the WordPress Download Manager and Posts Table Pro plugin installed, activated, and configured on our website. In this section, we’ll create a new page to add our front-end document library too.
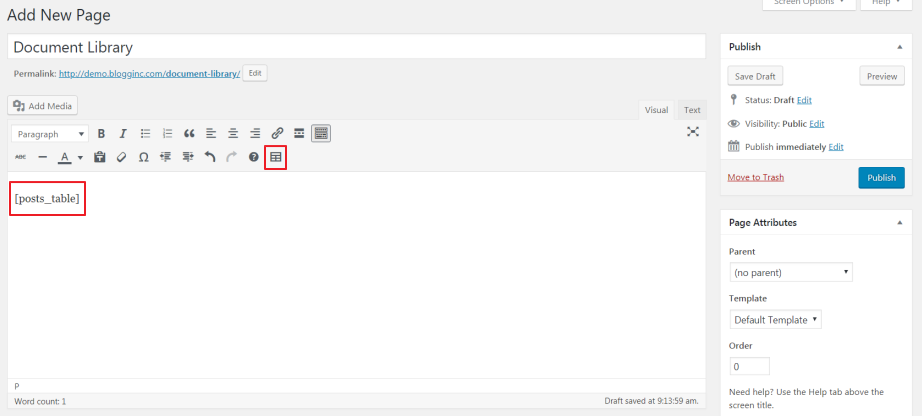
- Navigate to ‘Pages > Add New’ to create a new page for your WordPress document library. Alternatively, if you’ve already created a page that you’d like to add the WordPress document library to, open it up by navigating to ‘Pages > All Pages’.
- Click the ‘Insert Posts Table’ icon in the text editor’s toolbar to insert the shortcode.
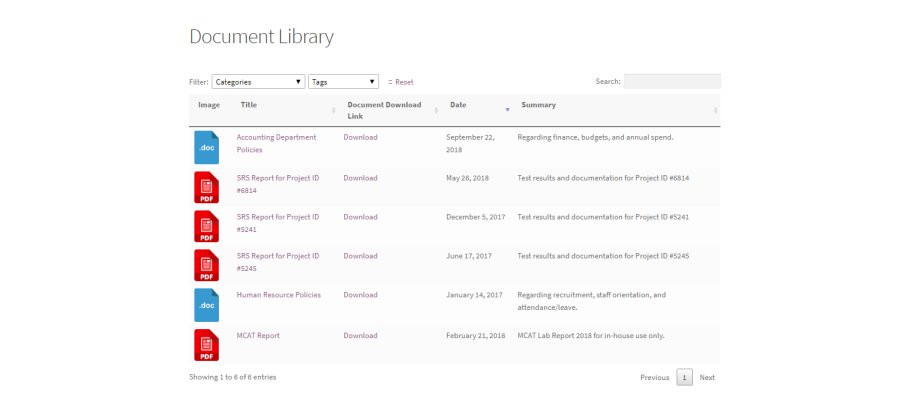
Front-End Preview of the WordPress Document Library
Here’s what your document library will look like on the front-end once you’ve published the page:
Create Multiple Document Libraries
Creating multiple document libraries makes document search and retrieval incredibly easy, fast, and intuitive. The benefit here is that your document library would contain documents relevant to, for example, a specific department only. For instance, if you’re working in an organization with a finance department and a human resources department, you could create two separate document libraries for each department.
Each document library would be on its own page. It would make it easier for staff members working under each department to find the documents they’re looking for much faster. This eliminates the need for a standalone WordPress file sharing plugin. You can follow the steps outlined in the tutorial above to create multiple document libraries on your WordPress website.
Following our example, here’s what you would have to do differently:
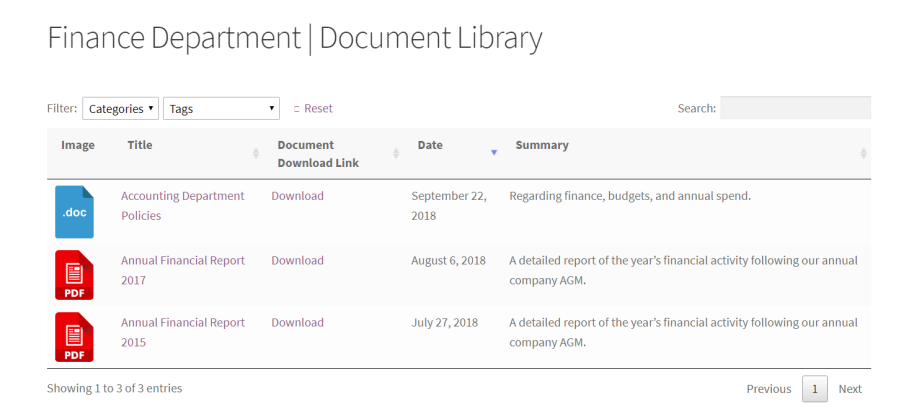
In Step 1, you’d create categories for each department in your organization e.g. legal, human resource, finance, etc. And finally, in Step 4, you would simply replace the shortcode [posts_table] with [posts_table term="wpdmcategory:finance"].
Note: Replace ‘finance’ with the name of your category.
By doing so, only the documents categorized under ‘finance’ would show up on the front-end in the document library. This way, your organization’s finance department’s document library might look something like this:
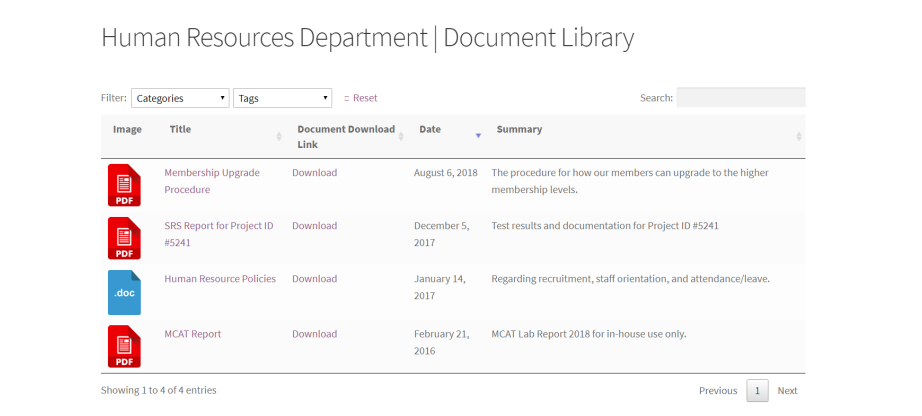
Whereas the human resources department’s document library might look something like this:
View Complete Document Download History
One of the key benefits of using the WordPress Download Manager plugin to build a WordPress file hosting system is that you’re able to view a complete document download history.
Therefore, you can view the document download history directly from your WordPress website’s back-end by heading over to ‘Downloads > History’.
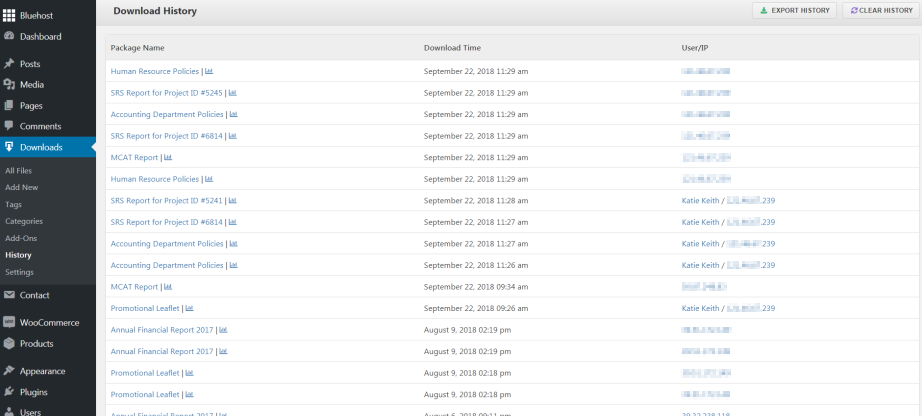
The plugin automatically keeps a record of everyone who has downloaded a document from your document repository. Specifically, it records:
- The title of the downloaded document.
- The time it was downloaded.
- Username/IP address of the user who downloaded the document.
What’s more, you’re able to export the entire document download history as a CSV file to your drive. This is incredibly useful if you’d like to keep a backup or use the data to gather analytics. It also gives you the option to clear history.
Making Your Document Management System Private
Finally, I’ll share some tips on how to create a private WordPress document library. You might want to this if the files you’re sharing will be available to specific people such as employees, on a private intranet, or otherwise hidden from public view.
The simplest way to do this is to password protect the page containing your table of documents. This will protect the page itself, but the underlying documents could still be indexed by search engines.
For a more robust solution, you can use the Password Protected Categories WordPress plugin to restrict access to each category of documents, as well as the main document library page itself. Create one or more passwords, and give a password to each person who needs access to the private downloads area. Solutions like just in time provisioning new users to register and log in, thus reducing the administrative workload.
Wrapping Up
With two WordPress document management plugins – WordPress Download Manager and Posts Table Pro – you can create a fully-functional, front-end document library on your website. Once your WordPress document library is up and running, users will be able to:
- Search for specific documents.
- Sort the document library by columns.
- Filter documents based on categories and tags.
- Download documents directly from the document library to their drive.
What do you plan on using your WordPress document management system for? Let us know by commenting below!